
Table of Contents
ToggleMost circular saw owners focus on power ratings and cutting capacity, but the single factor that determines whether a saw performs like new or struggles through every cut is blade condition. A sharp, clean blade reduces motor strain, delivers cleaner cuts, and prevents dangerous kickback. Neglecting blade maintenance shortens the lifespan of both the blade and the saw itself, turning what should be quick work into frustrating, splintered cuts that require sanding and rework. This guide walks through the essential blade maintenance tasks that keep a circular saw running safely and efficiently, plus the secondary maintenance steps that shouldn’t be ignored.
Key Takeaways
- The most important maintenance on a circular saw involves keeping the blade sharp and clean, as this reduces motor strain, prevents dangerous kickback, and delivers cleaner cuts.
- Clean your blade every 8–10 hours of use by soaking it in a diluted cleaner solution and scrubbing with a nylon brush to remove built-up resin and pitch that causes friction and burning.
- Recognize signs of a dull blade—such as burn marks, splintering, increased motor noise, or wandering cuts—to replace or sharpen it before damage accumulates.
- Install the blade correctly by verifying arbor size, ensuring teeth face the right direction, using the proper outer washer, and tightening the arbor nut firmly without over-tightening.
- Maintain motor ventilation, inspect bearings and cords, and keep the base plate waxed and guards clean to ensure safe operation and extend the saw’s lifespan beyond blade care alone.
Why Blade Maintenance Is the Foundation of Circular Saw Performance
The blade does all the actual work in a circular saw. Everything else, the motor, base plate, guards, exists to support that rotating disc of carbide-tipped steel. When a blade accumulates resin, pitch, or sawdust, it creates friction that forces the motor to work harder, generates excess heat, and increases the risk of binding or kickback.
Dull or damaged teeth compound the problem. Instead of slicing cleanly through wood fibers, worn teeth tear and crush, leaving burn marks, splintered edges, and a rough surface that requires additional finishing work. The saw compensates by drawing more amperage, which shortens motor life and can trip breakers on underpowered circuits.
A well-maintained blade also improves safety. Clean, sharp teeth bite into material predictably, reducing the chance of the saw grabbing or jumping during the cut. Operators can maintain better control with less forward pressure, which lowers fatigue and the risk of accidents. For anyone running multiple sheets of plywood or framing a deck, blade maintenance isn’t optional, it’s what separates efficient work from constant tool wrestling.
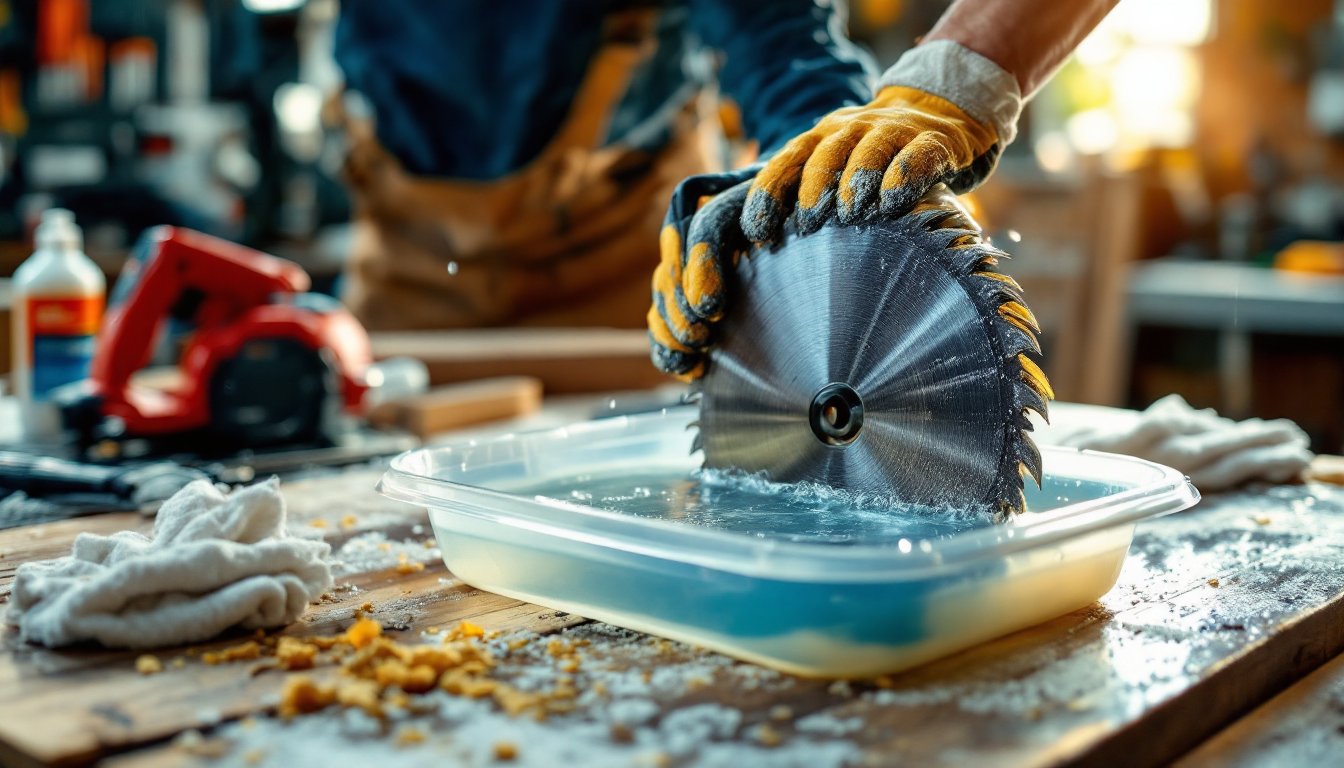
How to Clean Your Circular Saw Blade Properly
Cleaning a circular saw blade removes built-up resin, pitch, and sawdust that accumulate during cutting, especially when working with softwoods, pressure-treated lumber, or composite materials. This should be done every 8–10 hours of use, or sooner if the saw starts to labor or produce burn marks.
Materials needed:
- Commercial blade cleaner or Simple Green diluted 1:1 with water
- Stiff nylon brush (brass brushes can damage carbide tips)
- Plastic container large enough to submerge the blade
- Clean rags
- Safety gloves and eye protection
Step-by-step cleaning process:
- Disconnect the saw from power. For cordless models, remove the battery. This is non-negotiable.
- Remove the blade by locking the arbor (check the saw’s manual for the specific method, some use a spindle lock button, others require a wrench on the arbor nut).
- Place the blade in the plastic container and pour in enough cleaner solution to cover the teeth. Let it soak for 10–15 minutes. For heavily caked blades, extend the soak time to 30 minutes.
- Scrub both sides of the blade with the nylon brush, paying special attention to the gullets between teeth where resin collects. Work in a circular motion, following the blade’s rotation direction.
- Rinse the blade thoroughly with clean water and dry immediately with a clean rag to prevent rust. Inspect the teeth for chips or damage while drying.
- Apply a thin coat of WD-40 or blade lubricant to prevent oxidation, then wipe off excess before reinstalling.
Never use harsh solvents like acetone or lacquer thinner, which can break down the brazing that bonds carbide tips to the blade body. Avoid abrasive pads or steel wool, which scratch the blade surface and create more places for pitch to stick. Many DIYers who tackle woodworking project plans find that keeping a spare blade on hand allows them to swap out a dirty blade and clean it later, rather than interrupting workflow.
Recognizing When Your Blade Needs Sharpening or Replacement
Even with regular cleaning, carbide-tipped blades eventually dull from normal wear. Recognizing the signs early prevents damage to the workpiece and unnecessary strain on the saw.
Indicators that a blade needs attention:
- Burn marks on cut edges, even with moderate feed speed
- Increased motor noise or laboring during cuts that previously felt smooth
- Splintering or tearout on both faces of the cut, especially on plywood
- Wandering cuts that drift off the cut line even though proper technique
- Visible chips or missing carbide tips when inspecting teeth
- The saw requires excessive forward pressure to maintain cutting speed
For general-purpose 24-tooth or 40-tooth blades used in framing or rough carpentry, professional sharpening typically costs $8–$15 and is worth it for quality blades. Cheaper blades under $20 are often throwaway items, the sharpening cost approaches the replacement cost. Premium blades ($40 and up) can be sharpened 3–5 times before the carbide tips become too short to be effective.
Replacement becomes necessary when teeth show significant damage, the blade body is warped (check by laying it flat on a known-flat surface), or the arbor hole has elongated from overtightening. Warped blades cause wobble and unsafe cutting conditions, they should be discarded immediately.
Blade life varies dramatically based on material. Cutting abrasive materials like cement board, treated lumber, or engineered products dulls teeth faster than clean softwood. Operators working through DIY repair tutorials for home renovations often encounter hidden nails or screws in old framing, which can chip carbide instantly. Keep a dedicated “demo blade” for tearout work to preserve good blades for finish cuts.
Proper Blade Installation and Tension Adjustment
Incorrect blade installation is surprisingly common and causes most blade-related problems. The process is straightforward but requires attention to specific details.
Installation steps:
- Verify the blade matches the saw’s arbor size (most circular saws use a 5/8-inch arbor, but some compact models use 1/2-inch). Check the blade’s maximum RPM rating against the saw’s no-load speed, mismatched specs can cause blade failure.
- Ensure the blade teeth face forward in the direction of rotation. Most saws have an arrow on the blade guard indicating direction.
- Place the blade on the arbor, then add the outer washer (flange). The recessed side of the washer should face the blade to center it properly.
- Thread the arbor nut on by hand first to avoid cross-threading, then tighten with the wrench while holding the arbor lock. Firm is sufficient, overtightening can distort the blade or strip the arbor threads. The nut typically has left-hand threads on right-handed saws (counterclockwise to tighten), which prevents the nut from loosening during operation.
- Before releasing the arbor lock, give the blade a slight spin by hand to confirm it rotates freely without wobble or rubbing against the guards.
Common installation mistakes:
- Installing the blade backward (teeth facing the wrong direction) results in aggressive, dangerous cutting behavior and rapid dulling
- Forgetting the outer washer allows the blade to wobble
- Using washers from a different saw that don’t match the blade diameter creates instability
- Over-tightening the arbor nut, which can warp thin-kerf blades or crack carbide tips
Circular saws don’t have adjustable blade tension like table saws or band saws, proper tension comes from correct washer installation and appropriate tightening torque. If a blade continues to wobble after correct installation, either the blade is warped or the arbor/bearings are worn, both of which require professional attention or saw replacement.
Additional Critical Maintenance Tasks for Circular Saw Longevity
While the blade receives primary focus, several other maintenance tasks directly affect saw performance and safety.
Motor ventilation: Circular saw motors rely on cooling vents to dissipate heat. After every few uses, blow out the vents with compressed air or use a shop vacuum with a brush attachment. Sawdust accumulation inside the motor housing causes overheating and premature motor failure. Always wear a dust mask when cleaning to avoid inhaling fine particles.
Arbor and bearing inspection: The arbor should spin smoothly without lateral play. Grasp the blade (when the saw is unplugged) and try to wiggle it side-to-side. Any movement beyond minimal deflection indicates worn bearings that need professional replacement. Rough or grinding sounds during operation confirm bearing problems.
Cord and plug condition: For corded saws, inspect the power cord regularly for cuts, exposed wiring, or damaged insulation near the plug. Replace damaged cords immediately, don’t tape them. Check that the plug prongs aren’t bent or corroded. For cordless models, keep battery contacts clean with a dry cloth and monitor battery performance. Batteries that no longer hold a charge or overheat during use should be replaced.
Depth and bevel adjustments: These mechanisms collect sawdust that can freeze the adjustment levers. Clean the adjustment slots with a brush and apply a small amount of dry lubricant (graphite powder or silicone spray, avoid oil-based lubricants that attract dust). Verify that both adjustments lock securely and don’t drift during cutting.
Cleaning the Base Plate and Guards
The base plate (shoe) and blade guards are often overlooked but directly impact cut accuracy and safety. A dirty base plate doesn’t glide smoothly across material, causing binding and imprecise cuts. Sawdust packed around the guard mechanism can prevent it from retracting or closing properly.
Base plate maintenance:
Wipe the base plate clean after each use with a damp rag to remove resin and sawdust. For sticky buildup, use the same blade cleaner mentioned earlier. Check that the base plate is flat, if it’s bent from being dropped, cuts will be inaccurate and the saw may rock during use. Most base plates are aluminum and can’t be straightened once bent.
Apply a light coat of paste wax (the kind used for table saw tops) to the base plate’s bottom surface. This reduces friction and helps the saw glide through cuts with less effort. Buff off excess wax before using. Many builders working through building project guides discover that a waxed base plate makes long rip cuts significantly easier.
Guard maintenance:
The retractable blade guard should move freely through its full range of motion. Test it before each use by retracting it manually and releasing, it should snap back to cover the blade immediately. If it sticks, remove accumulated sawdust from the pivot points with a brush and compressed air. A few drops of light machine oil on the pivot pin keeps movement smooth. Never prop the guard open or remove it, the guard is the primary protection against accidental contact with the spinning blade.
Inspect the guard for cracks or damage, particularly on the leading edge that contacts the workpiece. A cracked guard should be replaced immediately through the manufacturer or an authorized parts supplier.
Conclusion
Blade maintenance forms the core of circular saw care, but it’s part of a broader maintenance routine that includes cleaning, inspection, and proper storage. A saw that receives regular attention delivers consistent performance, safer operation, and years of reliable service. Most maintenance takes minutes and requires no special skills, just the discipline to make it part of the workflow rather than waiting for problems to develop.