
Table of Contents
ToggleCedar decks offer natural beauty, durability, and that warm, woodsy aroma that pressure-treated lumber can’t match. But left to fend for themselves, they’ll turn gray, splinter, and rot within a few seasons. The good news? A little preventive maintenance goes a long way. Whether you built your deck last year or inherited one with the house, understanding how to clean, seal, and repair cedar will keep it looking sharp and structurally sound for decades. This guide walks through the essential tasks, no guesswork, no fluff.
Key Takeaways
- Cedar deck maintenance prevents gray weathering, rot, and structural damage by protecting the wood’s natural oils through regular cleaning, sealing, and repairs over 2-3 year cycles.
- Clean your cedar deck with oxygen bleach (not chlorine) and a soft-bristle brush before sealing; use a pressure washer carefully on 25-40° fan setting at least 12 inches away to avoid gouging the wood.
- Apply penetrating oil-based stain-sealer combos every 2-3 years when water stops beading on the surface, and wait until the wood moisture content drops below 15% after thorough drying.
- Address common cedar deck issues immediately: sand splinters with 80-grit sandpaper, replace popped nails with 3-inch deck screws, fill small cracks with exterior wood filler, and replace boards with structural rot.
- Perform seasonal maintenance tasks including spring inspections and staining, summer vegetation trimming, fall leaf removal, and winter snow clearing with plastic shovels to extend your deck’s lifespan to 20+ years.
- Regular inspection twice yearly catches problems early, while ignoring maintenance leads to costly board replacements or structural repairs within 5-7 years instead of enjoying a beautiful, safe deck for decades.
Why Cedar Decks Need Regular Maintenance
Cedar’s natural oils give it impressive resistance to rot and insect damage, but those oils don’t last forever. Within six months of installation, untreated cedar starts losing its reddish hue and fading to silver-gray as UV rays break down the lignin in the wood fibers. That weathered look might work for a beach cottage, but it’s a sign the wood is becoming more porous and vulnerable.
Moisture is the real enemy. Without a protective barrier, water seeps into the grain, causing the wood to swell and contract with every weather cycle. Over time, this leads to cupping, cracking, and eventual rot, especially in horizontal surfaces like deck boards where water can pool. Algae, mildew, and mold love damp cedar, leaving dark stains that eat away at the wood’s integrity.
Regular maintenance, cleaning, sealing, and occasional repairs, prevents these issues before they become expensive replacements. Most homeowners can handle the work themselves with basic tools and a free weekend. Skip it, and you’re looking at board replacements or even structural repairs within five to seven years instead of enjoying a deck that lasts 20-plus.
Essential Cleaning: Your First Line of Defense
Before any stain or sealer touches your deck, the surface needs to be clean and dry. Dirt, pollen, mildew, and old finish residue block penetration and lead to patchy, peeling results.
Start with a deck cleaner formulated for cedar or natural wood. Avoid chlorine bleach, it damages wood fibers and strips the natural color. Oxygen bleach (sodium percarbonate) is a safer bet. Mix according to package directions, usually one cup per gallon of water. Apply with a pump sprayer, let it sit for 10-15 minutes (don’t let it dry), then scrub with a stiff-bristle brush. Pay extra attention to shaded areas where mildew accumulates.
A pressure washer speeds things up but requires caution. Use a fan tip (25° or 40°) and keep the nozzle at least 12 inches from the surface. Too much pressure or a narrow nozzle will gouge the wood, leaving permanent furrows that trap water. Test on an inconspicuous spot first. Move in the direction of the grain, overlapping passes slightly.
After cleaning, rinse thoroughly with a garden hose. Let the deck dry completely, 48 to 72 hours in dry weather, longer if it’s humid. Cedar’s moisture content should be below 15% before applying any finish. A moisture meter (available for under $30) takes the guesswork out. Many deck maintenance practices emphasize proper drying time to prevent trapping moisture under sealers.
Safety note: Wear safety goggles, rubber gloves, and closed-toe shoes. Deck cleaners can irritate skin and eyes.
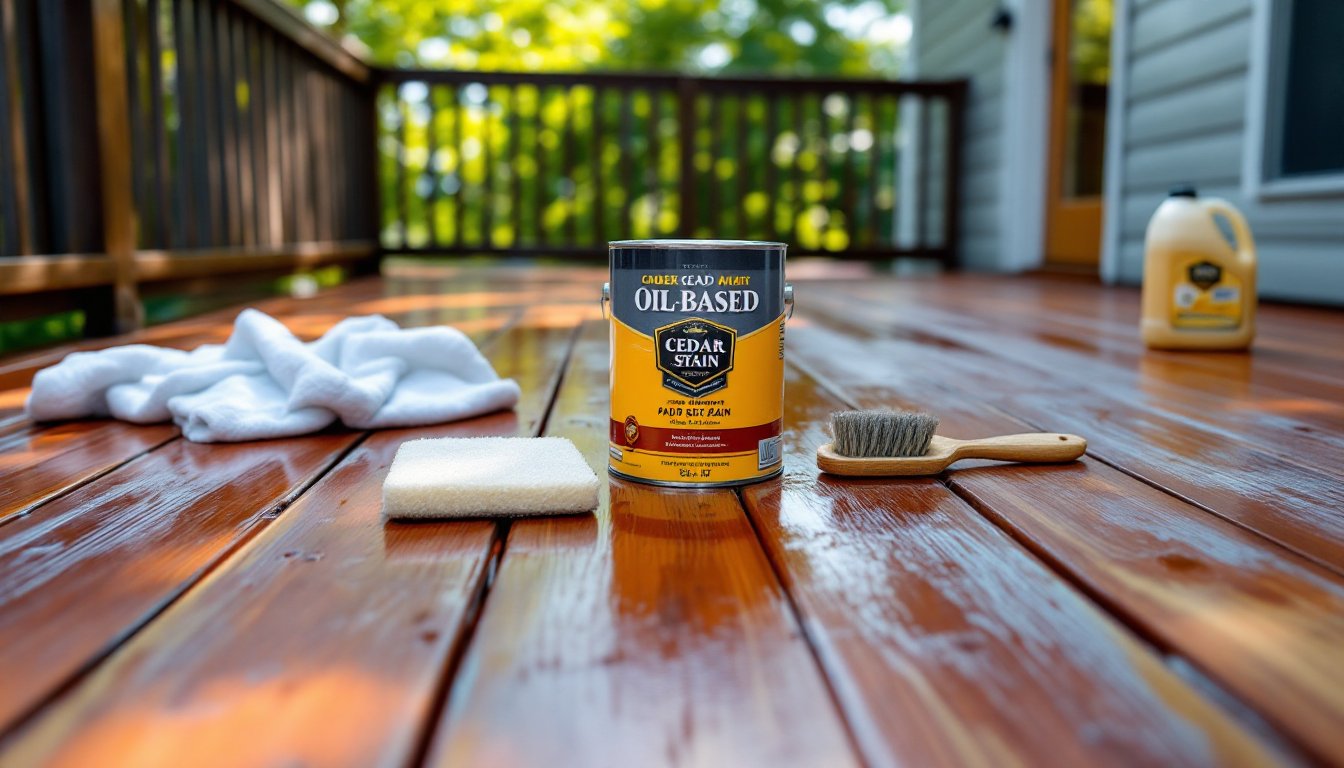
Staining and Sealing Your Cedar Deck
Stain and sealer are often combined in one product, but understanding the difference helps. Stain adds color and UV protection: sealer repels water. For cedar, a penetrating oil-based stain-sealer combo offers the best protection without forming a surface film that can peel.
Choose a semi-transparent or transparent stain to let cedar’s grain show through. Solid stains hide the wood’s character and behave more like paint, fine for hiding old, discolored wood, but they require more upkeep. Look for products with UV inhibitors and mildewcides. Oil-based formulas penetrate deeper than water-based, though they take longer to dry and require mineral spirits for cleanup.
Application is straightforward: use a paint pad, roller, or pump sprayer with a back-brushing step to work the stain into the grain. Start at one end and work your way off the deck, don’t paint yourself into a corner. Apply one coat, then assess. Cedar’s absorbency varies: some boards soak up more than others. A second coat can go on after 2-4 hours if the first coat looks uneven, but don’t over-apply. Excess stain that doesn’t penetrate will sit on the surface and get sticky or tacky.
Coverage: Most stain-sealer combos cover 150-250 square feet per gallon, depending on wood porosity. Rough-sawn or weathered cedar uses more product than freshly milled boards.
When to Apply Stain and Sealer
Timing matters. New cedar should weather for 2-4 weeks after installation before staining, allowing mill glaze (a shiny surface residue from sawing) to wear off so stain can penetrate. After that initial treatment, plan to reapply every 2-3 years depending on sun exposure, foot traffic, and climate.
The best application window is 50-90°F with low humidity and no rain in the forecast for at least 24-48 hours. Avoid direct sunlight, stain dries too fast and won’t penetrate. Early morning or late afternoon works well, or tackle shaded sections during midday.
If water stops beading on the surface and soaks in instead, it’s time to reseal. Don’t wait for the wood to turn gray: by then, you’ll need to clean and possibly sand before restaining.
Repairing Common Cedar Deck Problems
Even well-maintained cedar decks develop issues. Catching them early prevents small fixes from becoming big projects.
Splintering and rough spots: Sand the affected area with 80-grit sandpaper on a random orbital sander or sanding block, then finish with 120-grit for smoothness. Feather the edges so the repair blends in. Wipe away dust, then touch up with matching stain.
Popped or loose nails: Cedar’s expansion and contraction can back nails out over time. Pull them with a cat’s paw or nail puller, then replace with 3-inch deck screws. Screws hold better and won’t pop. If the original fastener was a nail, drill a pilot hole to prevent splitting.
Cracked or split boards: Small cracks (under 1/4 inch) aren’t structural, just cosmetic. Fill them with exterior wood filler, let it cure, sand smooth, and restain. Wider splits or cracks that run the full length of a board compromise strength. Replace the board. Pro tip from home repair guides: check the joists underneath while you’re at it, if the decking failed, the framing might show wear too.
Rot and soft spots: Probe suspect areas with an awl or screwdriver. If it sinks in easily, the wood is compromised. Cut out the rotted section with a circular saw, stopping at the nearest joist on each side. Sister in blocking between joists if needed for support, then install a new piece of cedar cut to fit. Seal the cut ends with wood preservative before fastening.
Loose railings: Tighten all bolts and screws on railing posts and balusters. If a post rocks at the base, the connection to the rim joist or deck framing may have failed. This is a structural concern, improper railing attachment can fail a building inspection and pose a safety hazard. Most codes require railings on decks over 30 inches above grade, with posts spaced no more than 6 feet apart and able to withstand a 200-pound concentrated load. If in doubt, consult a licensed contractor.
PPE for repairs: Wear work gloves, safety glasses, and a dust mask when sanding or cutting.
Seasonal Maintenance Tasks to Keep Your Deck Beautiful
Breaking maintenance into seasonal chunks makes it manageable and catches problems before they escalate.
Spring:
- Sweep away winter debris, especially in gaps between boards where leaves and pine needles trap moisture.
- Inspect for winter damage, loose boards, popped fasteners, new cracks.
- Clean and apply stain/sealer if it’s been 2-3 years or water no longer beads.
- Check flashing where the deck attaches to the house: gaps let water infiltrate the structure.
Summer:
- Trim back plants and shrubs touching the deck: foliage holds moisture and blocks airflow.
- Move planters occasionally to prevent trapped moisture and staining underneath.
- Hose down the deck after barbecues to prevent grease stains (hot water works better than cold).
Fall:
- Sweep or blow leaves weekly, wet leaves are like a moisture blanket.
- Inspect under the deck for signs of rot, pest activity, or deteriorating posts.
- Clear gutters so roof runoff doesn’t cascade onto the deck.
- If you live where it snows, consider applying an extra coat of sealer before winter: salt and freeze-thaw cycles are brutal.
Winter:
- Shovel snow with a plastic shovel to avoid gouging the wood. Don’t use metal-edged tools.
- Avoid ice-melt products containing sodium chloride or calcium chloride, they corrode fasteners and dry out wood. Sand or kitty litter offer traction without damage.
- After heavy snow, check that weight isn’t stressing railings or causing boards to sag.
Many DIY maintenance schedules recommend a full deck inspection twice a year, spring and fall, to stay ahead of repairs. A few minutes with a flashlight and notepad can save hundreds in reactive fixes.
Conclusion
Cedar deck maintenance isn’t complicated, but it is non-negotiable if you want decades of use from your investment. Clean it annually, seal it every few years, fix small problems before they spread, and keep an eye on seasonal wear. The payoff is a deck that stays beautiful, safe, and structurally sound, no premature replacements, no rotted joists, no regrets. Get after it.